Do you want to learn how to scan an object for 3D printing?
3D laser scanning allows for the instant digitization of any existing objects for 3D printing purposes and more. The process of 3D scanning can be an intimidating and complicated process but with the right tools or software, almost anything can be 3D printed.
How Do I Scan 3D Objects for 3D Printing?
Here is a quick overview of the 3D laser scanning process that you need to create 3D print files.
- Prepare the scanned object by eliminating debris and applying scan targets.
- Scan the object using a 3D laser scanner.
- Post processing of the scan data.
- STL file creation.
- The mesh is further refined into CAD software.
- Export into STL format.
- Uploaded into 3D printing software.
Continue reading to learn about 3D laser scanners, the scanning process, and file creation.
What is a 3D Laser Scanner?
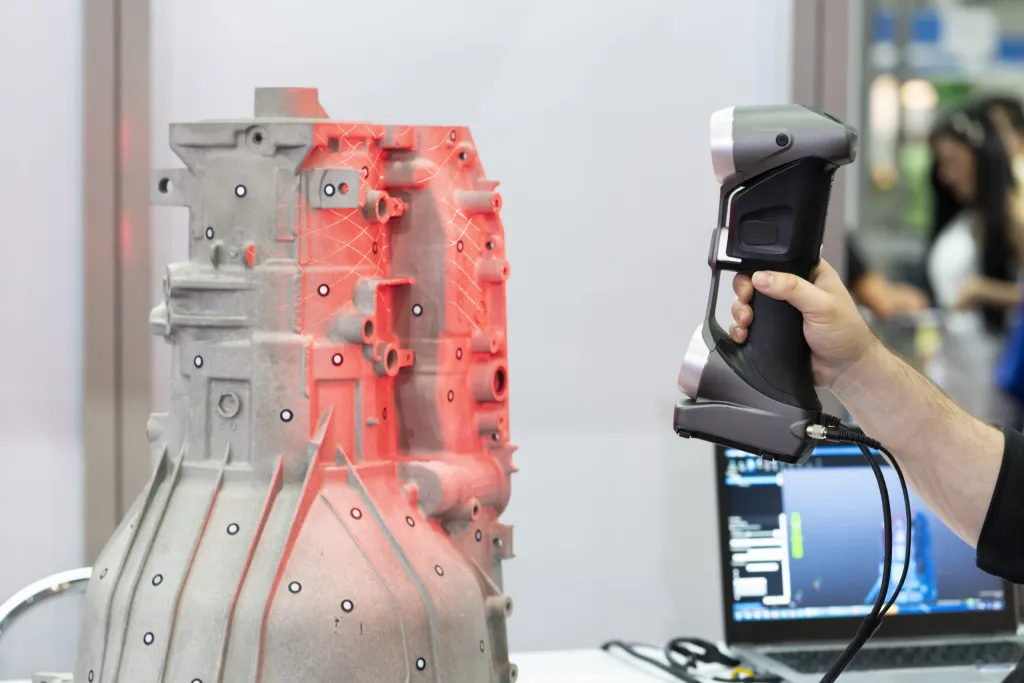
A 3D laser scanner is a device that uses laser technology to create a digital 3D model of a physical object or environment. It works by emitting a laser beam onto the object or environment and measuring the surface by way of triangulation
What is triangulation? It is a technique used to determine the position of a point in space by measuring angles from multiple known points.
The scanner collects the data and creates a point cloud or mesh file. This a collection of 3D points that represent the surface of the object or environment.
Scan data can be used to create a digital 3D model that can be manipulated, edited, and used for various applications such as 3D printing, reverse engineering, quality control, and more.
3D laser scanners are used in a variety of industries including engineering, motorsports, medical, entertainment, and manufacturing.
Click here for examples of the most recent projects our company has worked on.
Why Should I Use a Laser Scanner?
To 3D scan an object for 3D printing, you will want to use a 3D laser scanner, preferably a blue light laser scanner.
A blue light laser scanner is a type of 3D laser scanner that uses a blue light laser to capture three-dimensional data of an object. Blue light laser scanning technology is the newest and most advanced technique compared to other laser scanning methods.

Compared to other laser scanning methods, blue light laser scanners can capture data at a higher resolution and with greater accuracy.
They are often used in industries such as aerospace, automotive, and engineering for applications such as quality control, reverse engineering, and prototyping.
Our company uses a blue light laser scanner that delivers precision up to 0.02 millimeter.
There are applications available that allow using a phone or photogrammetry platforms to take several pictures around the object and stitch them together to create a mesh file.
However, if dimensional accuracy is a goal in your project, you need to use a laser scanner.
3D laser scanning platforms can be expensive. Not only do you need the hardware, the system needs to run off its own native software and capable computer. Many seek out 3D scanning services from a service provider.
If you are ready to learn about our 3D scanning services, this page explains more in depth on the process of using us as your service provider.

How to Scan An Object for 3D Printing
When you are ready to 3D scan an object for 3D printing, here is an overview of the scanning process.
In the steps below, we will be using our laser scanner and the process for this specific platform.
1. Prepare the Object for Scanning
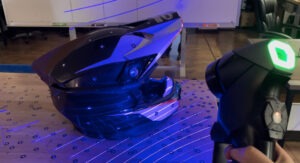
Arrange the object on a table or in a suitable environment that allows for the lasers to scan most of the object’s surface.
Some projects will require two scans and in post processing, the two files will merge together.
Place the small 6-millimeter stickers on and around the object. These targets reflect the lasers back to the scanner and record the data by triangulation.
With ultra-precise blue light laser scanners, previous methods of spraying CAD/CAM spray are not necessary. However, with products that are ultra-reflective or see-through, a scanning technician will spray coat the object with a temporary matte powder to improve scan accuracy.
2. 3D Scan the Object
Calibrating and activating the scanner, lasers will pass over the object and record everything it sees within the target field.
The scan mesh will be created instantly on screen. This allows a technician to verify that all of the data is collected while also visualizing what needs more precision.
There are variety of settings that enhance the scanning process including shutter speed, definition, and single laser mode.
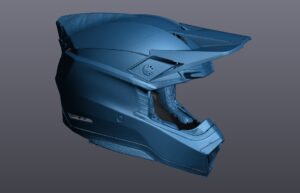
3. Refine the Mesh
When you 3D scan an object for 3D printing and other applications, the laser will detect the environment in its entirety. This includes the table where it is scanned for example and any debris on the object. All this data will need to be deleted in the software.

The scanner’s native software will allow a technician to delete unwanted data while also repairing small gaps and spikes. Called post processing, this simplifies the scan, making the data efficient as possible.
All data will need to be post-processed in order to create planes, and origins, and established into a universal file format.
4. Exporting the Mesh
Once the scan data is post processed, it will need to be aligned on an XYZ plane. This allows the file to be in its natural form and not floating around in “space” essentially.
In this step, rotate and move the scan mesh into alignment with any existing design components.
After proper alignment has been fulfilled, the file is simply exported as an STL.
What is an STL file? An STL file is a standard file format used for 3D printing and computer-aided design (CAD) applications. It contains a 3D model’s surface geometry in the form of a mesh of triangles.
This mesh is a representation of the surface of the 3D model, in the form of many small triangles that approximate the surface of the model.
STL files are for 3D printing because converting the data into machine-readable code allows the printer how to print the object layer by layer.
Importing STL files into CAD software allow for the visualization, simulation, and analysis of any project. However, they are not useful for dimensionally accurate modifications or manufacturing.
STL files can import into most 3D modeling software and is a standard format in the 3D printing industry.
Now, a word of CAUTION when trying to 3D scan an object for 3D printing.
If you have a very difficult shape or a lot of detail in your object, your scan data HAS to go through the reverse engineering process into a CAD file. If a detail is not properly representing in your STL file, the print quality will be terrible and may cause the print to fail.
3D Scanning and 3D Printing for Reverse Engineering
When you are learning how to scan an object for 3D printing, manually reverse engineering scan data is going to give you the most accurate digital data.
For features such as pockets, dimensions, and holes to represent accurately, the STL scan data will be redrawn the scan model as a reference.

Reverse engineering software allows us to create sketch planes aligned with plain surfaces on the scan and to extract cross sections from the scan mesh, which assist you to match the shape of the original object.
The finalized export will be a CAD file, commonly in STEP, IGES, and XT format.
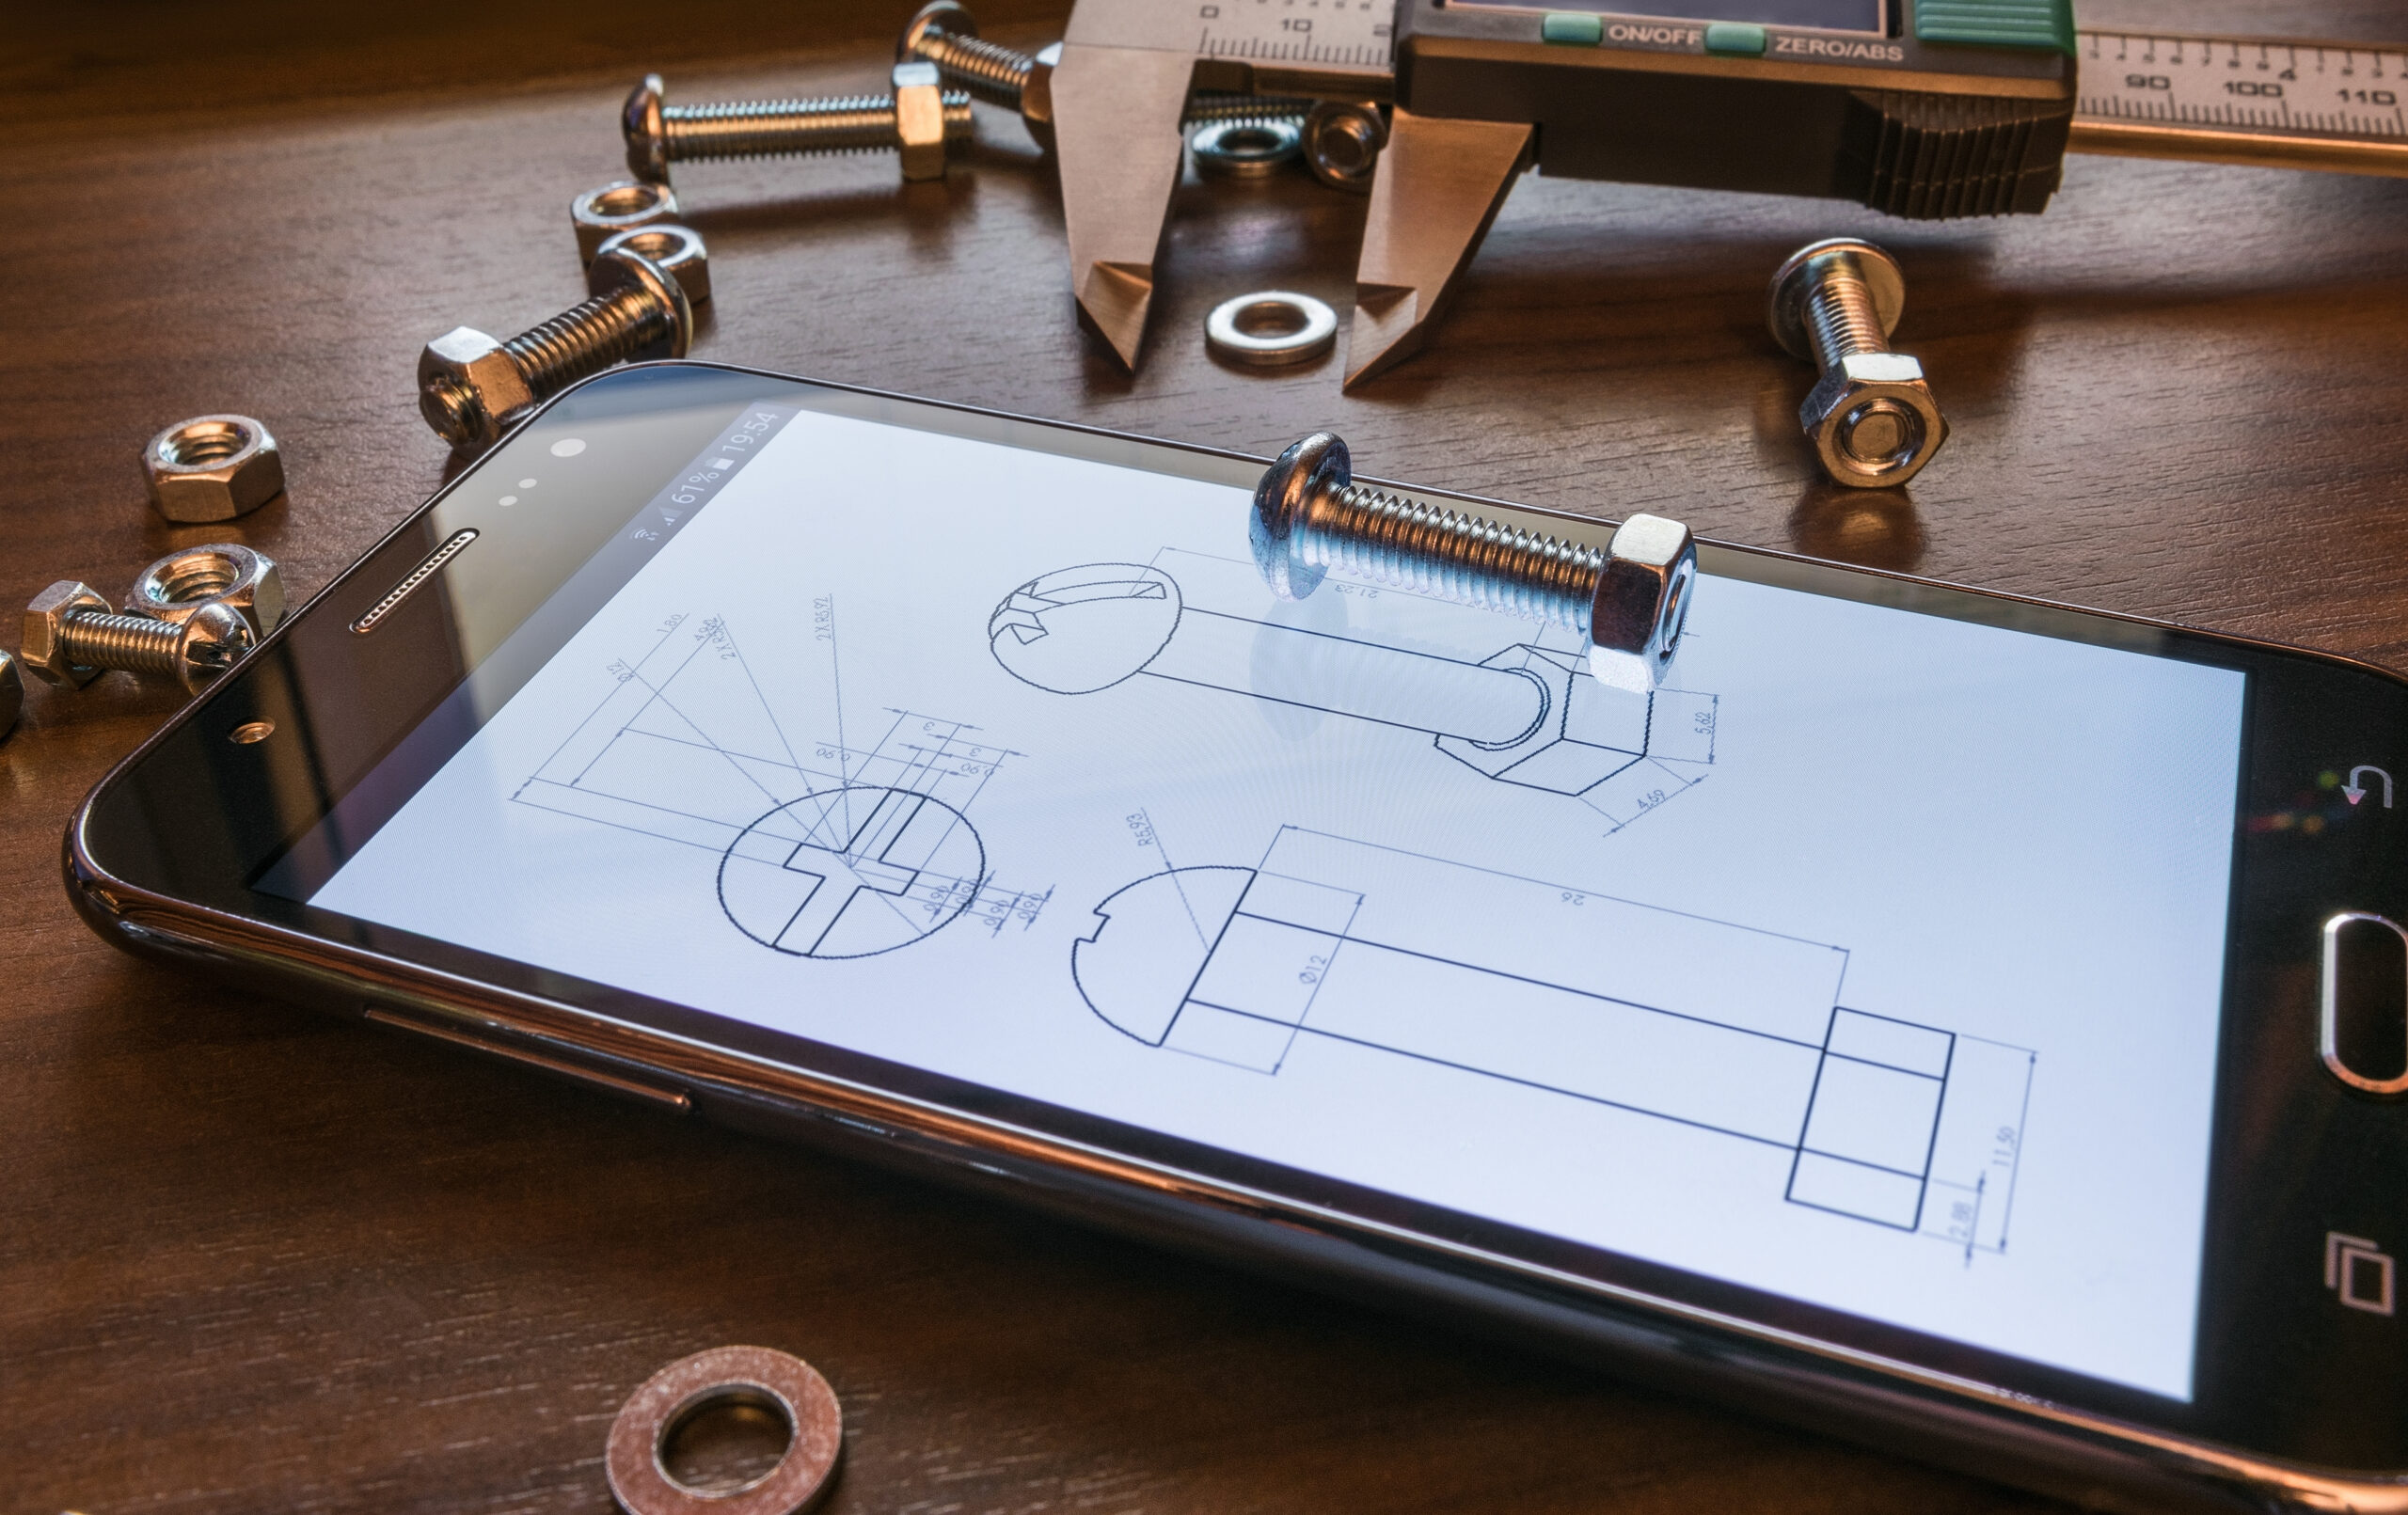
What is a CAD File?
CAD stands for Computer-Aided Design. A CAD file is a digital file format that contains a 2D or 3D drawing created using computer software.
By creating CAD files, you will be able to design, modify, and analyze their designs in a virtual environment. The software typically includes a variety of tools and features that allow users to create precise geometries, add dimensions and annotations, and create 3D models.
Reverse engineering allows for file creation that is geometrically correct. It will provide exact data for the 3D printing process which results in better prints.
Having trouble understanding the difference between CAD and STL files? Take a look through our sample folder to view the various types.
After Scanning and File Creation
When the scanning process is complete and the files will export in either STL or CAD, it is time to upload the data into the 3D printer’s software.
Depending upon the 3D printer, this can be done on a computer or simply inserting a flash drive directly into the printer.
The printing software will analyze the file by placing it virtually on the print bed to find the best printing set up. Here the software will also dictate how much time and material the printer will need.
After finding a successful set up, press go and your print will start.
Conclusion
After reading this article on how to 3D scan an object for 3D printing, you now have an understanding of the preparation and work flow to create files, ready for 3D printing.
With accessibility to a 3D scanning service provider, you have the ability to digitize any existing product to quickly generate files for 3D printing.